Full details
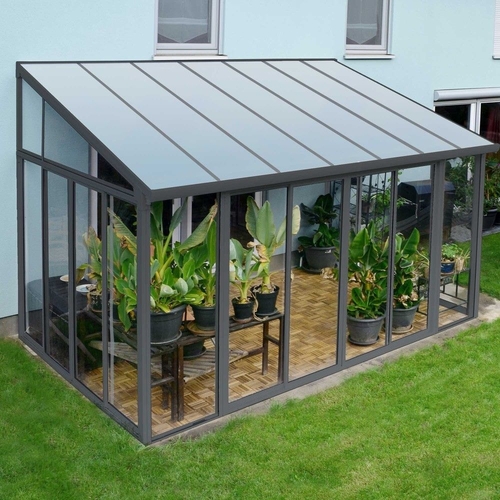
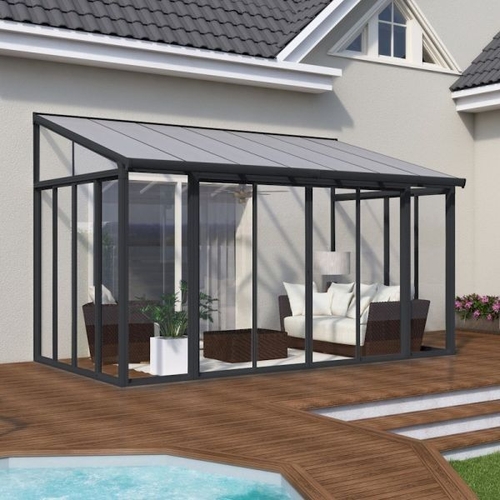
The Palram Canopia SanRemo Veranda is designed for homeowners seeking to extend their living space outdoors, offering a robust and elegant solution for all-season enjoyment. This versatile veranda provides a protected environment for relaxation, dining, or entertaining, transforming your patio into a serene, yet functional, 'outdoor room.' While offering significant benefits, successful installation requires a perfectly flat, level surface and a solid supporting wall for optimal stability and performance.
All features
| Model Part Number | 703708 |
|---|
| Brand | Palram - Canopia |
|---|
Extended Product Information
FAQs
What kind of foundation is required for the SanRemo Veranda?
A perfectly flat, level, and solid surface is essential. It also needs to be at a 90-degree angle to a solid supporting wall of your home for proper and safe installation.
Are the roof panels durable enough for harsh weather?
Yes, the 8 mm multi-wall polycarbonate panels are virtually unbreakable and highly resistant to fracturing, discolouring, and shattering. The veranda is designed to withstand winds up to 120km/hr and snow loads of 150kg/m².
Can I collect rainwater from the veranda?
Absolutely. The SanRemo Veranda features a built-in gutter system with adjustable gutter heads, allowing you to easily collect rainwater for sustainable use in your garden.
Is the veranda difficult to assemble myself?
The veranda is designed for DIY assembly with pre-drilled profiles and a ready-to-assemble structure. While it can be done in a weekend, it is recommended to have at least two people for the assembly process due to the size and weight of components.
What are the dimensions of the assembled veranda?
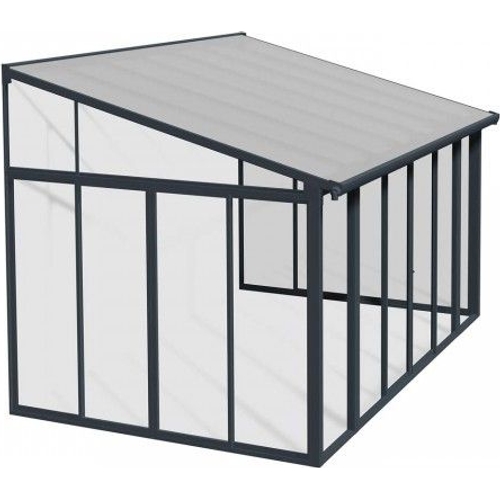
The assembled dimensions are approximately 300 cm (9'8'') in width, 435 cm (14'3'') in length, and 310 cm (10'2'') in height. The covering area is 12.8 square meters (137.7 sq ft).
What is the light transmission of the roof panels?
The clear polycarbonate roof panels allow for 65% natural light transmission, providing a bright and airy space while offering protection from direct sunlight and UV.
Can the doors be locked?
Yes, the veranda features three double, lockable sliding doors for enhanced security and privacy. A master key is included.
Troubleshooting
The sliding doors feel stiff or don't move smoothly.
Check the tracks for any debris, dirt, or obstructions. Clean them thoroughly with a brush or vacuum. You can also apply a silicone-based lubricant sparingly to the tracks to improve smoothness. Ensure the veranda base is level, as unevenness can affect door operation.
Water is leaking from the roof or seams.
Inspect all roof panel seals and frame connections. Ensure the polycarbonate panels are correctly seated and all securing elements are tightened according to the assembly instructions. Check for any damage to the panels or sealing strips. If a specific seal is damaged, contact customer support for replacement parts.
The veranda feels unstable or wobbly after assembly.
This often indicates an issue with the foundation or wall attachment. Re-verify that the ground surface is perfectly flat and level, and that the veranda is securely anchored to a solid wall at a 90-degree angle. Check all frame connections and bolts to ensure they are fully tightened.
Rainwater is not draining effectively from the gutters.
Clear any leaves, twigs, or other debris from the gutter channels and the gutter heads. Ensure the gutter heads are positioned correctly to direct water away or into a collection system. Check that the veranda is installed with a slight forward tilt as per instructions, allowing water to flow naturally.
Pros & Cons\n\n### Pros\n- Expands Living Space: Creates a versatile outdoor room for various activities, from dining to relaxation, usable in all seasons.\n- Exceptional Durability: Built with a robust aluminum frame and virtually unbreakable polycarbonate panels, ensuring longevity and resistance to harsh weather.\n- Natural Light & Protection: Clear roof panels allow 65% natural light while offering protection from UV rays and elements.\n- Enhanced Ventilation & Access: Three double sliding doors provide excellent airflow and easy entry/exit.\n- Sustainable Features: Built-in gutter system allows for rainwater harvesting.\n- DIY Friendly: Comes ready-to-assemble with pre-drilled profiles, designed for weekend installation.\n\n### Cons\n- Site Preparation Required: Demands a perfectly flat, level ground surface and a solid 90° supporting wall for proper installation.\n- Fixed Design: Offers less flexibility in customization beyond its standard dimensions and grey color.\n- Assembly Time: While DIY-friendly, assembly is a multi-person task likely requiring a full weekend.
Setup, Compatibility & Care\n\n### Setup Instructions\n\n1. Site Preparation: Before starting assembly, ensure your chosen ground surface is perfectly flat and leveled. It must also be at a 90° angle to the supporting wall of your home. A solid, level foundation is crucial for the veranda's stability and correct alignment.\n2. Wall Support: The veranda requires a solid wall support for attachment. Verify that your home's wall is structurally sound and capable of bearing the veranda's weight.\n3. Unpack and Organize: Carefully unpack all components and identify each part using the included instruction manual. Lay them out in an organized manner to streamline the assembly process.\n4. Frame Assembly: Follow the step-by-step instructions to assemble the aluminum frame using the pre-drilled profiles and laser-cut galvanized steel connectors. This is often a two-person task.\n5. Roof Panel Installation: Once the frame is secure, install the 8 mm multi-wall polycarbonate roof panels into their designated channels. Ensure they are correctly seated for weather sealing.\n6. Door Installation: Mount the three double, lockable sliding doors, ensuring they slide smoothly and lock securely. Test the master key with all locks.\n7. Gutter System: Connect the built-in gutter system and adjust the gutter heads as desired, especially if you plan to collect rainwater.\n8. Final Inspection: Double-check all fastenings, ensure doors operate correctly, and confirm the structure is stable.\n\n### Compatibility\n\nThe Palram Canopia SanRemo Veranda is designed to integrate seamlessly with most residential properties that have a suitable flat patio or garden area adjacent to a solid external wall. Its grey frame color and clear roof panels offer a neutral aesthetic that complements various architectural styles.\n\n### Care and Maintenance\n\n- Routine Cleaning: Regularly clean the polycarbonate panels and aluminum frame with a soft cloth, mild soap, and water. Avoid abrasive cleaners or harsh chemicals, which can damage the materials.\n- Gutter Maintenance: Periodically check and clear the gutters and gutter heads of any leaves or debris to ensure proper water drainage and prevent blockages.\n- Door Tracks: Keep the sliding door tracks clean from dirt and grit to maintain smooth operation. A silicone-based lubricant can be applied if doors become stiff.\n- Structural Inspection: Annually inspect all bolts, screws, and connections for tightness. Retighten any loose fasteners to ensure the veranda's long-term stability.\n- Snow Removal (Heavy Loads): While designed for significant snow loads, it is advisable to gently clear excessive snow accumulation during prolonged heavy snowfalls to prolong the life of the structure. Use a soft brush or broom to avoid scratching the roof panels.

 Shedstore£3,299.00Visit shop
  Debenhams£5,041.14Visit shop


