
Artex Easifix Wall Repair Kit - White

Best current price£30.74from B&Q
Best offers
Shopping.co.uk recommended and popular offers
 B&Q£30.74Visit shop
 B&Q - Easifix Wall Repair Kit1Kg
Visit shopBest current price£30.74from B&Q
Shopping.co.uk recommended and popular offers
B&Q£30.74Visit shop B&Q - Easifix Wall Repair Kit1Kg
Visit shop1 offer from £30.74
View price history by clicking the chart icon.
This guide is for anyone looking to quickly and effectively repair wall damage using the Artex Easifix Wall Repair Kit. This ready-mixed filler offers a smooth, durable finish, perfect for both small touch-ups and larger repairs. However, it's important to note that while it's fast-setting, the final curing time might vary depending on environmental conditions.
| Colour | White |
|---|---|
| Brand | Artex |
Drying time depends on the thickness of the application and environmental conditions. Generally, allow several hours for complete drying.
No, this product is designed for interior use only.
You will need a filling knife and sandpaper. A utility knife may be useful for preparing the damaged area.
Store in a cool, dry place. Reseal the container tightly after each use to prevent the filler from drying out.
Yes, once the filler is completely dry, you can prime and paint it to match your existing wall colour.
Coverage depends on the depth and size of the damage, but 1kg is typically sufficient for several small repairs.
Yes, the filler is designed to be easily sanded to a smooth finish once dry.
Ensure the surface is clean, dry, and properly prepared. Lightly sand the area to provide a better surface for the filler to adhere to.
Apply the filler in thin layers, allowing each layer to dry completely before applying the next.
Use fine-grit sandpaper and apply gentle pressure. Make sure the filler is completely dry before sanding.
Avoid applying thick layers of filler. Use multiple thin layers and allow each layer to dry thoroughly.
This kit is compatible with plasterboard, drywall, and most common wall surfaces. Clean tools immediately after use with water. Store the product in a cool, dry place and reseal the container after use to prevent drying.
 Artex Easifix Texture Repair Kit, 1.5Kg - WhiteFrom £34
 Brother MFC-J5740DW - A3 Wireless Multifunction Printer - WhiteFrom £228
 EcoFlow GLACIER Classic Portable Fridge Freezer - 45LFrom £729
 Brother - MFC-J6760DW - Black Printer - attributes: Brand: Brother, Colour Family: Black, MPN: MFCJ6760DWZU1From £250
 Tower Kettle, Toaster, Microwave - White/BlueFrom £95
 Countertop Dishwasher - Living and Home - WhiteFrom £166
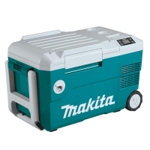 Makita Cooler/warmer Box - DCW180Z - BlueFrom £504
 Majority Quadriga Internet Radio & CD Player - BlackFrom £248
 Brother DCP-T580DW Multifunction Inkjet Printer - BlackFrom £220
 Haden Microwave - 20L - 800W - BlackFrom £69
 APC Replacement Battery - APC - APCRBC117From £290
 Seasonic Core BC-650 650W Power Supply - Seasonic - SRP-CBC651-A5A51JFFrom £50