Atomos TX-RX Wireless Video Transmitter and Receiver System
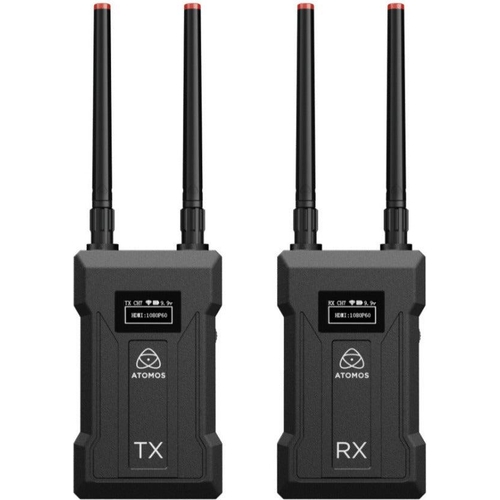
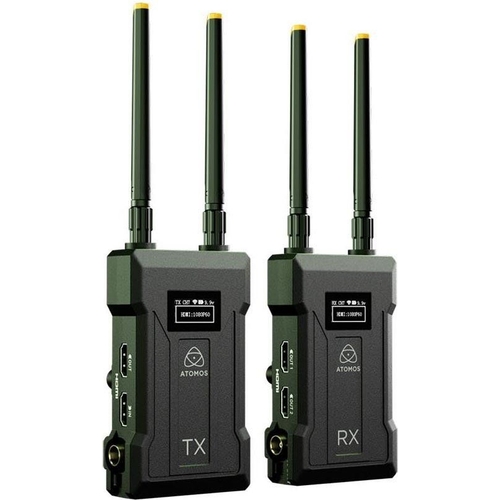
The Atomos TX-RX Wireless Video Transmitter and Receiver System transmits up to 4Kp30 from HDMI in...The Atomos TX-RX Wireless Video Transmitter and Receiver System transmits up to 4Kp30 from HDMI input and 1080p60 from SDI, with a range of up to 300 metres for video monitoring and production workflows. This system is designed for filmmakers, content creators, and broadcast crews, delivering pristine 4Kp30 over HDMI and 1080p60 over SDI. It supports up to 4 receivers per transmitter with an ultra-low latency connection across distances up to 300 meters. The TX-RX offers flexible power options via NP-F batteries, USB-C, or 9–16V DC input, and features dual HDMI/SDI connectivity for broad compatibility. Its compact and lightweight design integrates seamlessly into various camera setups, enabling a cable-free workflow.
The Atomos TX-RX Wireless Video Transmitter and Receiver System is designed for filmmakers, content creators, and broadcast crews seeking reliable, long-range wireless video transmission. Its key benefit is enabling a cable-free workflow with pristine 4Kp30 over HDMI or 1080p60 over SDI, reaching up to 300 meters. A potential caveat for some users might be the reliance on external power sources like NP-F batteries, USB-C, or DC input, requiring users to manage battery life or power connections.
All features
Model Part Number
TX-RX
Brand
Atomos
Extended Product Information
FAQs
What is the maximum range of the Atomos TX-RX system?
The system offers a reliable wireless video transmission range of up to 300 meters under optimal conditions.
Can I connect multiple monitors to one transmitter?
Yes, the Atomos TX-RX system supports up to four receivers connected to a single transmitter, allowing for multiple monitoring points.
What video resolutions and frame rates does it support?
It supports up to 4Kp30 resolution over HDMI input and 1080p60 resolution over SDI input.
How is the system powered?
The TX-RX system provides flexible power options including NP-F style batteries, USB-C (5V), or a 9–16V DC input.
What is the latency of the video transmission?
The system is designed for ultra-low latency, ensuring near real-time video transmission suitable for professional monitoring.
Does it work with both HDMI and SDI sources?
Yes, the transmitter features both HDMI and SDI inputs, and the receiver has both HDMI and SDI outputs for broad compatibility.
How do I update the firmware?
Firmware updates are typically performed via a USB connection to a computer using the Atomos Connect software. Please refer to the official Atomos website for the latest firmware and instructions.
Troubleshooting
No video signal on receiver
Ensure both transmitter and receiver are powered on. Verify that the video source is connected correctly to the transmitter input. Check that the HDMI/SDI cables are securely connected. Confirm that the input/output formats match and that the units are paired.
Intermittent signal loss or dropped frames
Check for potential sources of interference (e.g., other wireless devices, dense Wi-Fi environments). Reduce the distance between the transmitter and receiver. Ensure antennas are properly oriented. Update device firmware if available.
Units not pairing
Turn both units off and then on again. Perform a manual pairing procedure as described in the user manual. Ensure there are no other active wireless video systems nearby that might cause interference during pairing.
Overheating
Ensure ventilation ports are clear of obstructions. Avoid operating in direct sunlight or very hot environments. If using battery power, ensure the battery is not contributing to excessive heat. Allow the unit to cool down before continuing use.
Pros and Cons
Pros
Exceptional transmission range for professional use.
Supports high-resolution formats (4K and 1080p) with both HDMI and SDI.
Ability to connect multiple receivers to one transmitter.
Flexible power options enhance usability in various scenarios.
Low latency ensures accurate real-time monitoring.
Cons
Requires external power sources (batteries or DC input).
Managing multiple receivers may require additional setup.
May require specific firmware updates for optimal performance with certain devices.
Initial cost can be a consideration for budget-conscious creators.
Setup, Compatibility & Care
Setup:
Connect your video source (camera or switcher) to the transmitter's HDMI or SDI input.
Connect your monitor(s) to the receiver's HDMI or SDI output.
Power both the transmitter and receiver units using NP-F batteries, USB-C, or DC power adapters.
Power on the units. They should automatically pair. If not, follow the on-screen prompts or manual for manual pairing.
Compatibility:
Video Inputs/Outputs: HDMI (up to 4Kp30), SDI (up to 1080p60).
Power Inputs: NP-F style batteries, USB-C (5V), 9–16V DC input.
Receiver Support: Up to 4 receivers per transmitter.
The system is generally compatible with professional broadcast cameras, cinema cameras, and monitors featuring HDMI or SDI connections.
Care:
Keep the units clean and dry. Use a soft, dry cloth for cleaning.
Avoid exposing the units to extreme temperatures or direct sunlight for extended periods.
Ensure ventilation ports are not blocked to prevent overheating.

 Wex Photo Video£390.00Visit shop


